
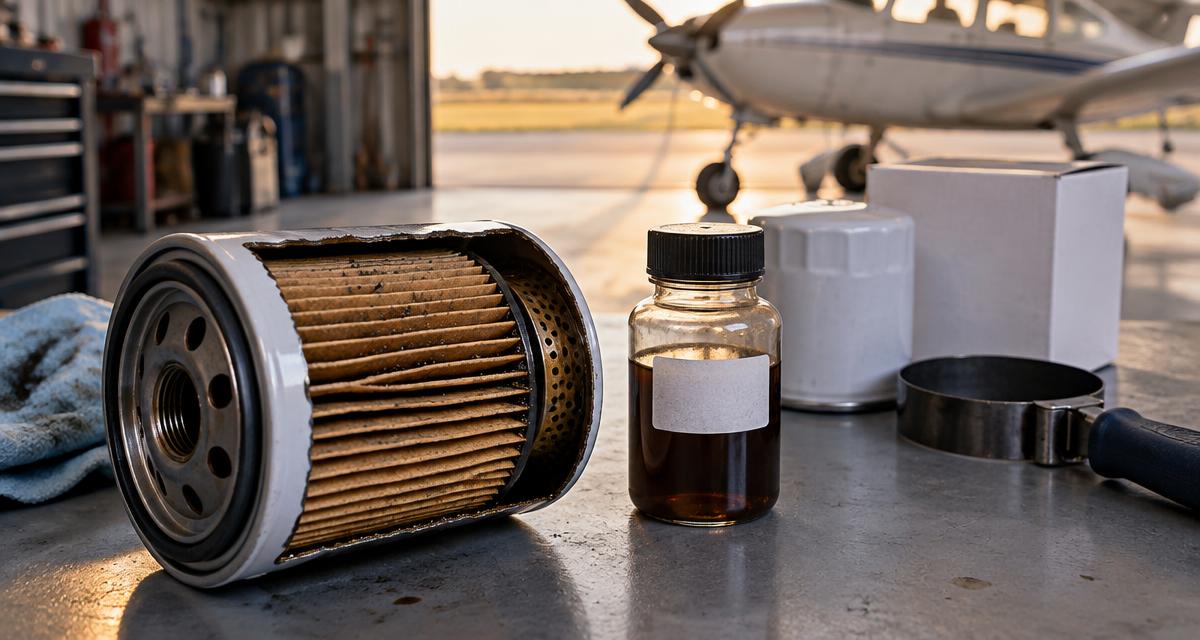
Most maintenance tasks cost money and return nothing you can see. An oil change is the exception: in the same twenty minutes that put clean oil in the engine, you get a bottle of used oil the lab can read and a filter you can cut open with your own hands. The difference between a change that produces evidence and one that produces only a clean engine is the order of the steps and a few small habits.
What you may do, and what you must write down
In the United States, Appendix A to Part 43 lists oil-filter servicing and the replacement of a spin-on engine oil filter among the preventive maintenance items an owner may perform, as long as the work involves nothing beyond draining fluid and removing readily removable fasteners. The moment the job needs more than that — a sump screen behind a cover that must be opened, a drain plug with a stripped thread, an oil cooler line — it is a mechanic's work, not yours.
Whatever you do, and whoever does it, the work has to be recorded: date, aircraft or engine hours, a description of what was done, the parts used, and the name of the person who did it. A change that is not logged is, on paper, a change that never happened — and it is also a change a future buyer cannot verify.
The ten minutes before you start
- Confirm the oil grade, the quantity and the filter part number against the aircraft flight manual or the Type Certificate Data Sheet, not against what the last person used.
- Have the sample kit, a marker and a label ready before the oil starts flowing. A bottle filled in a hurry gets mislabelled.
- Lay out a drain pan larger than you think you need, absorbent pads, gloves and eye protection.
- Check the new filter's contents: gasket present, bypass valve and anti-drain-back valve in place, element not crushed in the box.
- Have a fresh washer or crush gasket for the drain plug. Reusing a crushed copper washer is how stripped threads start.
- Run the engine until the oil is warm. Warm oil carries the contamination in suspension; cold oil leaves most of it in the sump.
The change, in order
- 1Drain into a clean pan. Once the flow settles, put the sample bottle into the stream and fill to the line — the middle of the flow, not the first flush and not the last dregs. Cap it immediately.
- 2Remove the old filter with a strap wrench or a filter cutter, and note how tight it was. Watch that the gasket comes with the filter, not against the case.
- 3Set the old filter aside for cutting rather than in the trash. Once it is in the bin it is gone, and so is the evidence.
- 4Clean the mounting surface and confirm the old gasket is off it. A second gasket left behind is a guaranteed leak.
- 5Wipe clean oil on the new gasket, screw the filter on by hand until it seats, then turn it the angle the manufacturer gives — commonly three-quarters of a turn. Never a wrench.
- 6Refit the drain plug with a new washer and the torque the manual gives, if it gives one. Over-crushing a plug is how sumps get damaged.
- 7Fill with the specified oil and write down the brand, the grade and how much went in.
- 8Start and check oil pressure comes up, then look hard at the filter and the plug for leaks while everything is still warm.
- 9Shut down, wait a few minutes, check the level and top up if it needs it.
- 10Write the log entry and drop the sample in the mail the same day. Both take two minutes and both are useless tomorrow.
Cutting the filter open
Cut along the axis, outside the folded media, so you open the can like a book instead of slicing through the pleats. A purpose-made filter cutter or a belt sander with the can held in a vise does it cleanly; a hacksaw works if you keep the cut away from the element. Gloves and eye protection, and no loose sleeves near anything that spins.
- The element itself: look at the pleats and the ends. A fine grey dusting is normal, especially in a young or recently overhauled engine. Flakes, chips, wire or glitter-like bright particles are not.
- Colour is a hint, not a verdict. Silver and grey usually come from the cylinder and ring surfaces; gold or brassy tones from bearings and bushings; dark rubbery bits from seals; aluminium-toned from pistons.
- The bypass valve spring: is it there, is it intact, does it have tension? A spring lying loose or a valve that no longer seats changes what the filter is actually doing.
- The anti-drain-back valve and the centre tube: a torn valve or a deformed tube explains a low-oil-pressure moment on start-up.
- Media that looks scorched, darkened unevenly or collapsed says the filter ran hot or was pushed past its job.
Making the sample worth reading
- Same lab, same oil brand and grade, same filter, for the whole history. Change any of them and your comparison resets.
- No additive or top-up product before a sample — you are measuring the oil and you just changed it.
- Write tail number, engine, hours at sampling and date on the bottle, not on the shipping box.
- Ship the same week. A bottle that sits for two months is a bottle whose story has already drifted.
Mistakes that cost more than the oil change
- Changing cold. The oil looks dark and the sample looks fine, and most of what mattered stayed in the sump.
- Sampling the first flush of the drain. It is the least representative fluid that will ever leave that engine.
- Wrenching the filter on. It deforms the gasket, leaks, and turns next month's change into a rescue operation.
- Refilling and walking away. The level after running is the number that counts.
- Leaving the old gasket on the case, then wondering where the drip comes from.
- Mixing brands or grades without writing it down, then wondering why the lab numbers moved.
- Trusting a sticker on the dashboard instead of the actual hours and the actual calendar.
The routine fits on one line: warm, drain, sample, cut, inspect, clean, fit, fill, run, leak-check, log, ship. Do those twelve things in that order and the same twenty minutes that gave you clean oil also gave you a record.
Frequently asked questions
Can I change my own oil?
In the United States, an owner may perform the preventive maintenance listed in Appendix A to Part 43, which covers oil-filter servicing and replacing a spin-on engine oil filter when the job is nothing more than draining fluid and removing readily removable fasteners. The work has to be logged. Aircraft used in commercial or instructional operations can carry stricter rules, and anything beyond that list is a mechanic's work.
How often should the oil and filter be changed?
Start from the aircraft flight manual, the engine manufacturer's guidance and any overhaul restriction, then shorten the interval for how you actually fly: short trips, lots of ground running, rich mixture, dusty strips and long idle periods all pull the interval down. Owners who sample at every change usually end up with a defensible interval instead of a guessed one.
Do I have to cut the filter open?
No rule requires it, and plenty of engines never show anything. But cutting a spin-on filter is the cheapest look inside an engine that exists: a few seconds of work that turns an opaque part into a visible one. If you would rather not cut, at least send the oil sample, and be honest that you are then flying on one sense instead of two.
Can I use a car oil filter or an automotive oil?
Use the approved part number and an aviation-grade oil. Automotive oils are formulated for different additive packages and different service conditions, and a physically similar car filter can differ in bypass-valve behaviour, relief pressure and how it is certified. The savings are small; the record you are building is worth more.
I found metal in the filter. What now?
Stop. Photograph the element and the cut can, keep the filter, take a proper sample, and call your certificated mechanic. Do not add an additive, do not top up and wait to see. Expect the next step to be a compression test or a borescope — those examine a specific cylinder, where the filter only says something is coming off.
Should I use a flush product to clean out sludge?
Be careful. Flush products change what you are measuring, can dislodge deposits that then block a passage, and reset your oil-analysis history. If sludge is the concern, show the last reports to your mechanic and let them decide what the engine actually needs.
More guides
Keep every due date in one place
VolamusApp tracks inspections, documents, discrepancies and costs for each aircraft and reminds you before anything lapses.